Using Chat Conditions to Target Specific Pages
You don't always want the chat widget on every page. FloatMessage lets you control exactly where and when chat appears using visibility conditions, URL targeting, scheduling, and geo-targeting. This guide covers all the options.
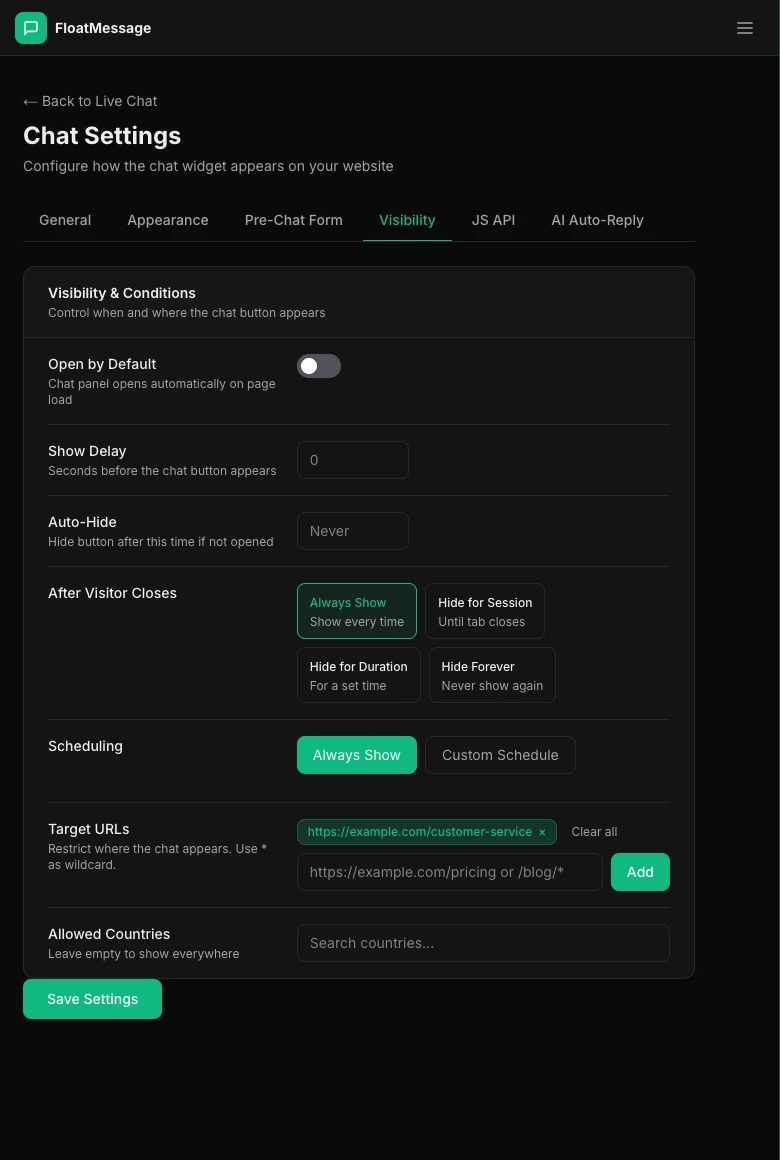
Open the Visibility tab
Go to Chat Settings and click the Visibility tab. This is where all targeting options live.
Control display behavior
The top section controls how the chat widget behaves when it loads:
Open by Default
When enabled, the chat window opens automatically when the page loads - visitors don't need to click the chat icon first. Great for support-heavy pages.
Show Delay
Set a delay (in seconds) before the chat icon appears. Useful for letting visitors read your content before prompting them to chat.
Auto Hide
Automatically hide the chat widget after a set time if the visitor hasn't interacted with it.
After Visitor Closes
Choose what happens when a visitor dismisses the chat: Always Reappear (show again on next page), Hide for Session (stay hidden until they close the browser), or Hide Forever (never show again on that device).
Target specific URLs
Use the Target URLs field to show the chat widget only on specific pages. Enter one URL per line.
Supported formats
- Exact URL —
https://example.com/pricing - Wildcard —
https://example.com/blog/*(matches all blog pages) - Path only —
/contact(matches on any domain)
Schedule chat availability
Use the Scheduling section to limit when the chat widget is visible - for example, only during business hours.
- Days of week - select which days the widget appears (e.g., Monday to Friday)
- Time range - set start and end times (uses the visitor's local time)
- Date range - optionally limit to a specific date range
Restrict by country
Use the Allowed Countries field to show the chat widget only to visitors from specific countries. This is useful if you only support certain regions.
Click Save Settings when you're done configuring.